BLOG POST #1
HOW I MAKE MY STICKERS
My most asked question is how I make my stickers, so I thought it would be appropriate to make this into the first blog post (YAY)!
I have wanted to start a blog post for so long, so I am so excited to get it up and running :)
Let's get started! I currently outsource my stickers from Sticker Blitz, but when I first started, I made ALL of my stickers at home. (Here is a link to my Amazon storefront, which has all my sticker supplies listed for easy access! Sticker making supplies )
STEP 1: DESIGNING

Start by designing your sticker. I use procreate, which is an app for IOS devices. I start by brainstorming what I want to design, and after playing around with it I end up with a design I'm happy with!
Once I’m done with my design I create a white outline - this will act as a cutting guide - behind my design and then save it as a PNG
STEP 2: UPLOADING TO DESIGN SPACE
Start by opening the design space and going to a new project.
- Press Upload
- Select from the Photo Library
- Make sure it looks good and press APPLY
- Select PRINT THEN CUT as the upload type
- Name your design
- Press Upload
STEP 3: FORMATTING
The maximum space cricut allows you to print on is a 6.75x9.25 box so we want to fill that box to make the most out of our sticker sheet
- Press SHAPES
- Select square
- Press edit
- Press the lock icon to unlock the square
- Change the size to 6.75 x 9.25
- Press arrange and send it back
Size all of your stickers to the size you want. I find 2.5 to be a good height. Once you arrange all of your stickers in the box, REMOVE the box. Select all of the stickers and press FLATTEN.
This step is super important or it won’t fit on your sheet correctly.
STEP 4: PRINTING
Once everything is formatted correctly press make it. TURN OFF THE BLEED and then press next. Select the material I normally use Medium Cardstock to get the perfect cut. Send your design to your printer and load your printer with your sticker paper. Press print and watch your sticker print!
STEP 5: LAMINATING
This is totally optional but it makes your stickers more durable and I would recommend you add this step. I use the Avery self-laminating sheets and cut the sheet to fit INSIDE the black box. I peel the backing and use a felt scraper to smooth it out. ( I like to use a felt scraper so it doesn't damage the sticker)
STEP 6: CUTTING THE STICKER

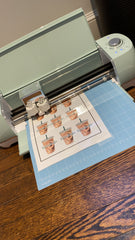
Place your laminated sheet on your cricut mat. I use the green one which is the standard mat. Put the sheet on the corner of the mat and load it into the Cricut Machine. Once it’s done cutting take the mat out of the machine and peel the excess to reveal your stickers!

And that's it! Congrats you made your own stickers! Let me know in the comments if you have any questions :)
Also here is the link to my storefront which has everything I use for my small business on a daily basis! Amazon Storefront
Thanks for tuning in and see you next time!
Love, Reggie


0 comments